maandag 23 september 2013

Sneak Preview


In Hardenberg zal Louise weer nieuwe sheets presenteren van Art Journey.
En oh oh wat zijn ze weer mooi!! Om van te watertanden..
 
Om alvast een tipje van de sluier op te lichten hier alvast een paar sneak previews.


zondag 15 september 2013

Aandacht is het mooiste wat je iemand kunt geven....

 
Aandacht is het mooiste wat je iemand kunt geven....
Attention is the most beautiful gift that you can give to someone...
 
 
 De stempel van de hortensia is van Stampendous en de tekst is van Different Colors.
The stamp Hydrangea Bunch is from Stampendous and the text is from Different Colors.
 
 
De hortensia heb ik gestempeld met Distress Ink Shabby Shutters en bestrooid met WOW pearl embossingpowder. Vervolgens verhit en met waterpenseel en Distress inkten is de afbeelding ingekleurd.
 
The Hydrangea Bunch is stamped with Distress Ink Shabby Shutters and embossed with WOW embossing powder Pearl. I coloured it with a waterbrush en distress ink.
 
 
De achtergrond van deze kaart is gemaakt met distress stains en heel veel water. Daarop in het nog natte oppervlak hier en daar wat holografisch glitter gestrooid en verhit. De tekst is gestempeld met Shabby Shutter Distress inkt.  De beide panelen gemat met rose cardstock en opgeplakt op een kaart.
 
The background was made with distress inks and a lot of water. In the still wet surface I sprinkled some holographic embossing powder and heated it. I stamped the dutch tetxt (it means :
Attention is the most beautiful gift that you can give to someone...)
with Distress ink Shabby Shutters. Both panels were matted with pink cardstock and glued together on the card.


zondag 1 september 2013

Art Journey Challenge Nr 37: Vintage


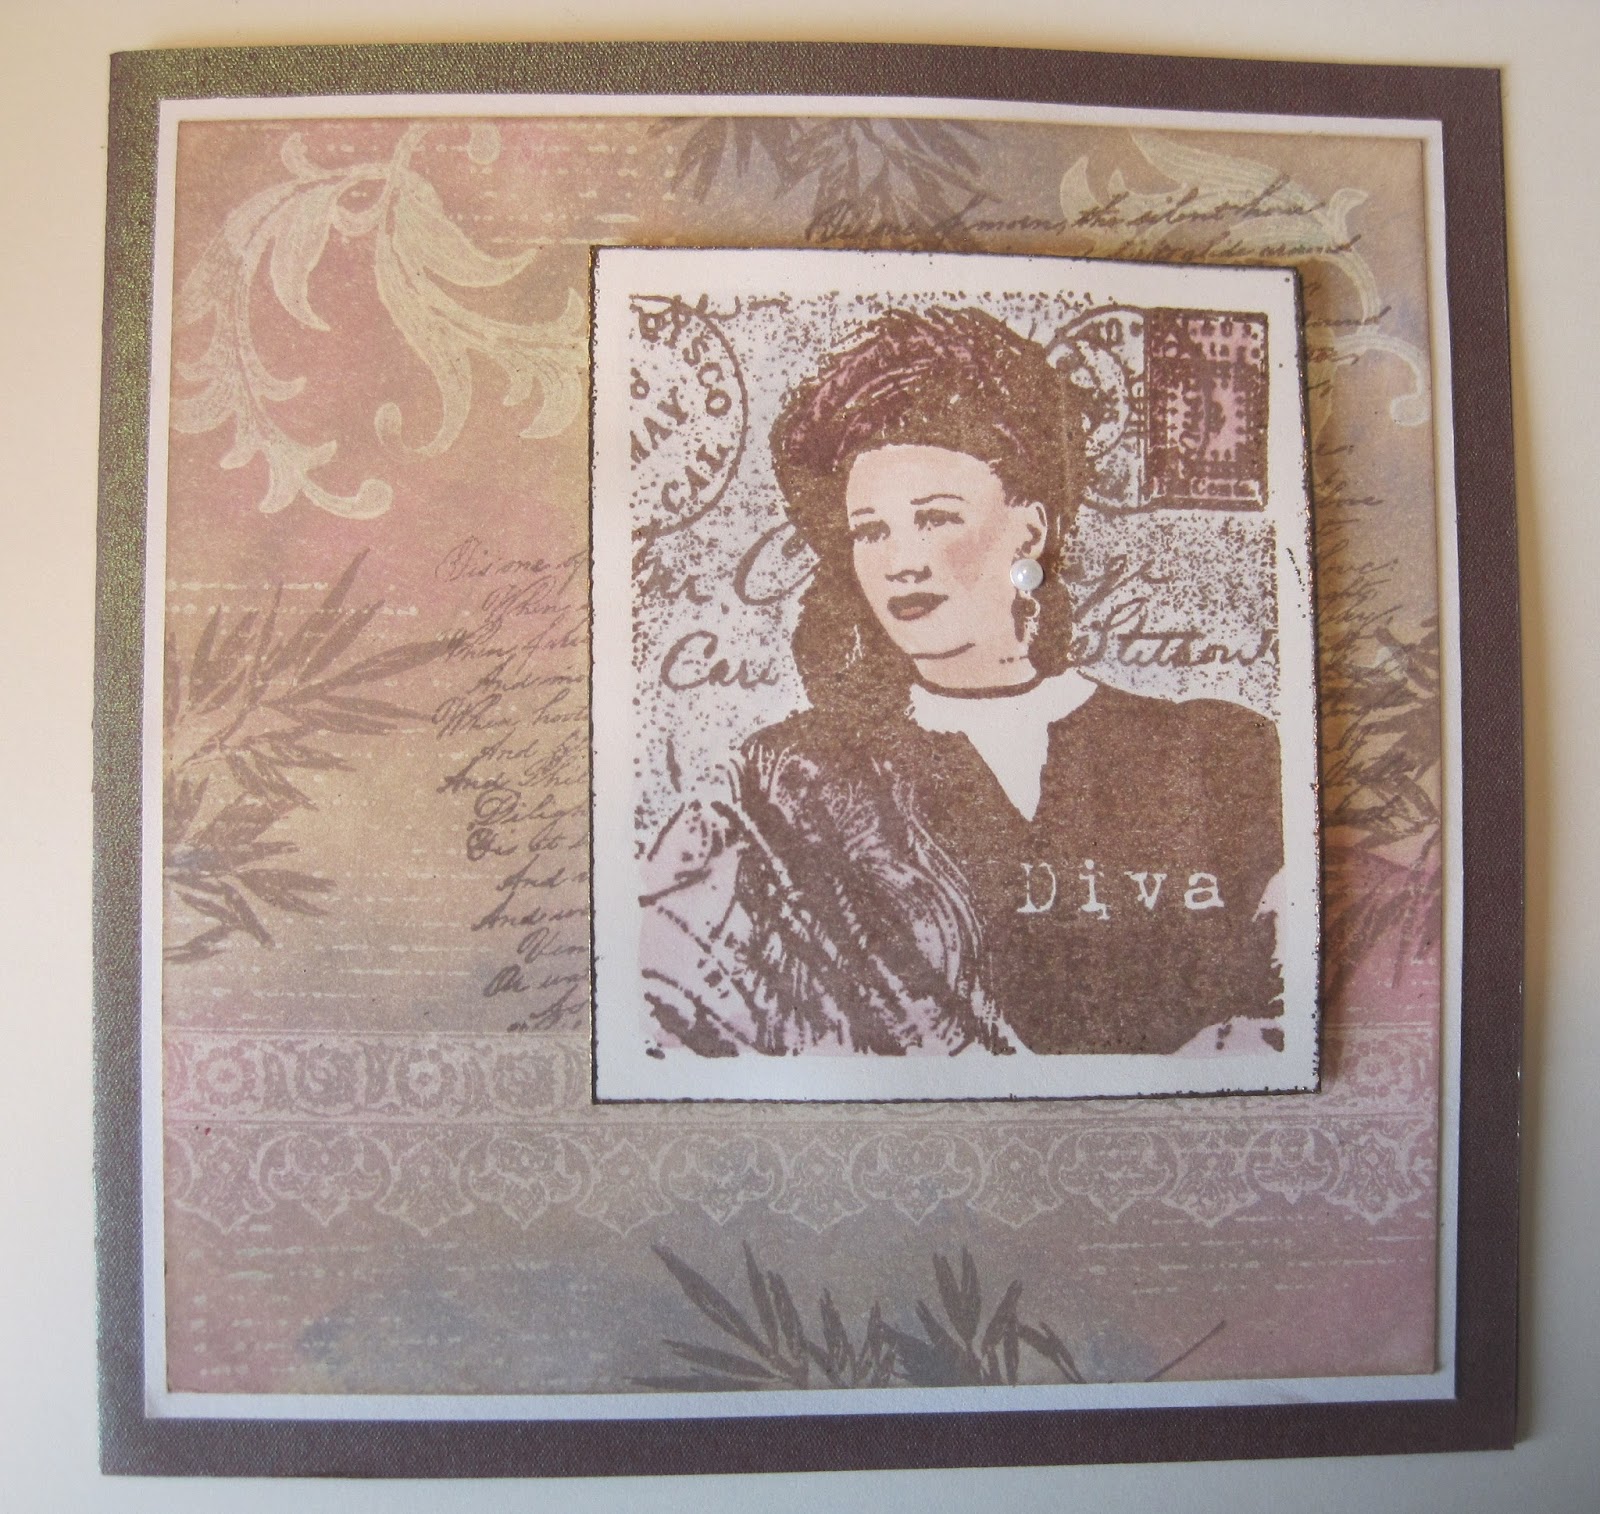
 Vintage Diva
for te Challenge nr. 37: Vintage
 

Voor de Challenge van deze maand heb ik gebruik gemaakt van een oude techniek: de ghost techniek. De eerste stempels gestempeld op wit papier met witte inkt Frost White van Colorbox.
De kantrand van de sheet Friends 1x, 4x de takken in de bovenste hoeken van de sheet Writing en hier en daar de lijntjes van de sheet Pages. Alles goed droog geblazen met de heattool. Daarna bracht ik royaal 3 andere kleuren pigment inkt aan, (direkt vanuit het stempelkussen) van Colorbox : Dune, Dusty Plum en Smoke Blue. De overtollige inkt veeg je nu weg met een stukje keukenrol en dan komt de resist weer tevoorschijn.
 
For the Challenge of this montheI used an old Technique, The Ghost Technique. At first I stamped my stamps on white paper with White ink: Frost White from Colrbox. The Laceborder from the sheet Friends1x, 4x the Acanthus leaf from the sheet Writing in the upper corners, and some lines from the sheet Pages. After that I dried everything well with a heattool. Then I brought on ink generous directly from the inkpad over the stamped images. I used Colorbox pigment ink in the colours Dune, Dusty Plum and Smoke Blue. After that I wipep off the ink with a paper towel and the resist will appear
 
 
Vervolgens heb ik met Versafine Vintage Sepia de takken van de sheet Tree gestempeld en ook de tekst van de sheet Text heb ik er hiermee schuin op gezet.
 
After that I stamped the branches from the sheet Tree and also stamped the text a bit diagonal with Versafine Ink Vintage Sepia
 
 
De stempel Diva is gestempeld met Versafine Vintage Sepia en ingekleurd met distress brush markers en een waterpenseel. Het randje van het paneeltje subtiel geembossed met goud embossingpoeder.
 
The Stamp Diva was stamped also with Versafine Vintage Sepia en I coloured it with the distress markers from Tim Holz with a waterbrush. The edges were subtle embossed with gold embossingpowder.
 
 
En een pareltje als oorbel maakt het geheel af. Het panneeltje opgeplakt met foamtape.
 A little pearl as a earring completed it and the pannel was raised with foamtape.


Kijk ook eens bij onze andere designteamleden voor prachtige inspirerende voorbeelden!
 Take a look with our other designteam members for inspiring artwork !


donderdag 8 augustus 2013

Just sitting Here thinking..

 
Just sitting here thinking..
 
A simple Card. The Background was made with Distress Stains and water. I stamped the tree with Stazon Timber Brown and also the text. The leaves were stamped with tazon Saddle Brown. I gave the Tree a bit of extra color with the Distress brushmarkers.
 
Een simpel kaartje. De achtergrond heb ik gemaakt met distress stains en veel water. De boom en de tekst heb ik gestemepd met Stazon Timber Brown en de blaadjes met Stazon Saddle Brown. De boom heb ik nog wat extra kleuraccenten gegeven met de Distress brushmarkers.


zaterdag 3 augustus 2013

Enjoy the Simple Things


Een kaart gemaakt met de geweldige stempels van Sheena Douglas. Achtergrond gesponst met Distress Ink. Inkleuren met de Distress brushmarkers van Tim Holz. De tekst is van Art Journey van de sheet Tree.
 
A card made with the beautiful stamps from Sheena Douglas. The backgrond was sponged with Distress Ink. The colouring was done with Distress Ink Brushmarkers from Tim Holz. The text is from Art Journey ( the sheet Tree )


vrijdag 2 augustus 2013

Relax

 
Relax
 
Een simpel kaartje. Van de kaart heb ik twee delen afgedekt.en vervolgens gesponst met Distress Inkt van licht naar donker. De bovenste afdeklaag vervolgens verwijderd en daarna de takken gestempeld. met StaZon Timber brown, en de tekst ernaast ook. Tenslotte wat kleuraccenten aangebracht met Faber Castell Polychromo kleurpotloden en de onderste afdeklaag weg gehaald.
 
A simpel Card. I covered two parts and then sponged the left area from light to darker with Distress Ink. Next I took the upper layer away and stamped the florals and the text with Stazon Timber Brown. In the End I gave the folrals some colour accents with Faber Castell Polychromo's couloring pencils and tokk away the lower layer.


donderdag 1 augustus 2013

Art Journey Challenge 36: Shades of Blue and Green


Precious Moments
for the Challenge nr 36 Shades in Blue and Green
 
Voor de Challenge van deze maand heb ik gebruik gemaakt van een produkt dat ik nog niet kende.. Splash Ink.  ( te koop bij Art Journey) Nu ik het eenmaal heb gebruikt denk ik dat ik ze nog heel erg vaak zal gaan gebruiken! Super Leuk ! Ik heb het verwerkt met een brayer. De Splash is er in 4 kleuren en met deze kleuren kun je ontelbare kleuren maken. Het kleurenschema zit bij de set ingesloten. Doe wat druppels op een wat dikker vel papier en rol de kleuren uit met een brayer. Er ontstaan de mooiste kleureffecten en je kunt er naderhand ook nog wat aan toevoegen qua kleur.
 
For the Challenge of this month I used a product that I wasn't familiar with yet.. Splash Ink ( Art Journey) Now that I've used it I probably will use it a lot more! Super Fun! I've used the Splash Ink with a brayer. The Ink is available in four colors and with these four colors you can\make a whole scale of colors. ( instructions sheet included in the set ) Put a few drops of Ink on a bit thicker paper and use the brayer to spread the colors out. The most beautiful colorefects reveil. You can add some more color or effects if you want.
 
Hiervan heb ik een strook gesneden en de rest komt vast nog wel een keer aan de beurt.. :)
Op deze strook heb ik verschillende stempels gebruikt van Art Journey en ik heb gestempeld met Stazon Midnight Blue. De tekst komt van de sheet Precious Moments.
 
I took a strip of this paper and the rest will remain for another project. On this strip I used everal stamps from Art Journey and I stamped with Stazon Midnight Blue. The text is from the sheet Precious Momets.


 Op een ander stukje papier heb ik de Tak gestempeld van de sheet Bird Boy met Stazon in de kleuren Midnight Blue en Cactus Green. 2x de Libel ( Gorgeous Kids) gestempeld op een restje en uitgesknipt. Vervolgens alles op een donkerblauwe kaart geplakt. Een rijtje met strass steentjes maakt het geheel af.
 
On another piece of Paper I stamped the branch from the sheet Bird Boy with the colours Midnight Blue and Cactus Green from Stazon. On a scratch I stamped the dragonfly ( from the sheet Goregeous Kids) 2x and cut it out with a small scissor. I glued all the panels on a darkblue Card. A row of small rhinestones finishes the card.